What do I do if my athlete got injured?

What Should My Athlete Do After an Injury? How Can They Safely and Quickly Get Back on the Field?

To answer these questions, let’s explore the sports physical therapy process for one of the most common soft tissue injuries in soccer: a quad strain. For more details on soft tissue injuries and the differences between strains and sprains, check out last week’s article here.

Soccer players are prone to soft tissue injuries due to the sport’s high demands of sprinting, kicking, and sharp directional changes. Kicking injuries are particularly common, with the rectus femoris muscle, part of the quadriceps group, being the most frequently injured.

The rectus femoris muscle spans both the hip and knee. When an athlete winds up to kick a soccer ball, this muscle quickly stretches and contracts to execute the kick. Any muscle that repeatedly lengthens and shortens rapidly, especially across multiple joints like the hip and knee, is at a higher risk of injury.

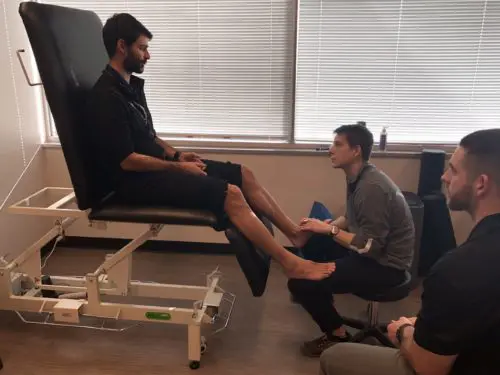
Immediately following an injury, the athlete should be evaluated by a physical therapist or sports medicine physician to assess the severity and determine the appropriate course of action. While imaging can be useful, it’s not always necessary.

The rehabilitation process for a muscle strain can be broken down into three distinct phases:

1. Injury Management Phase

The goals of this phase are to reduce pain and inflammation, restore the muscle’s range of motion, and reintroduce pain-free functional movements. While the injured tissues need time to heal, complete rest isn’t the answer. Light strengthening exercises and mobility drills are essential to stimulate the healing process, making early physical therapy crucial.

Examples of early-phase exercises for a quad strain might include:

– Isometric knee extension with hip extended

– Split squat isometric

– Single-leg bear hold

Once athletes regain a full range of motion without pain and can perform basic bodyweight movements, they move on to the next phase of rehabilitation. Unfortunately, traditional physical therapy often stops here, leaving many athletes struggling to bridge the gap between rehab and full performance.

2. Strength Training Phase

At the beginning of this phase, many athletes still face significant strength deficits.

Strength training is vital for improving the quality of the injured tissue and reducing the risk of reinjury. This is the time to hit the weight room.

Strength training exercises for an athlete recovering from a rectus femoris or quad strain might include:

– Reverse Nordic curls

– Lateral step downs

– Safety squat bar step-ups

3. Sport-Specific Training

What must the injured tissue be able to do for a safe return to sport?

This phase of rehab demands a deep understanding of the athlete’s sport, ensuring the injured area is prepared for the challenges ahead.

Since the rectus femoris is often injured due to continuous, rapid lengthening and shortening, this movement pattern must be replicated and trained during rehab to prepare the athlete for the demands of soccer.

Some examples of exercises used in this phase might include:

– Alternating split squat jumps

– Banded deceleration drills


While these three phases apply to all muscle strains, the recovery timeline varies based on factors such as the injured body part, the severity of the injury, and other individual factors.

If your athlete is dealing with a muscle strain, it’s essential to schedule an appointment with a physical therapist or sports medicine physician as soon as possible. Early treatment has been shown to get athletes back on the field faster and more effectively. If you suspect that you or your child has a muscle strain, schedule an evaluation with us right away.

The fall injuries we see in physical therapy

Are you the parent of a high school athlete? If so, you may have noticed an increase in injuries lately. At Cohen Health and Performance in McLean and Bethesda, we see many of these athletes for sports physical therapy.

While some injuries, like ACL tears, are traumatic, the most common injuries our physical therapists encounter are soft tissue strains and sprains.

Though these terms might sound similar, they refer to different types of injuries.

A strain is an injury to the muscle itself. Muscle strains often occur in the lower body during high-velocity activities like sprinting, cutting, and kicking. They can also happen in the upper body, typically from contact or a fall, though this is less common. Common lower-body muscle strains involve the hamstrings, calves, quadriceps (especially the rectus femoris muscle), and adductors.

If your athlete has strained a muscle, they will likely feel immediate pain in the affected area and describe a sensation of tearing or pulling in the muscle. Lower-body strains usually occur without contact and happen when an athlete is moving at high speed or decelerating.

A muscle strain can often be self-diagnosed at the time of injury using a few simple assessments:

– Pain when touching the injured area
– Pain when stretching the affected muscle
– Pain and/or weakness when contracting the affected muscle
– Possible bruising or discoloration of the skin over the injured area

A sprain, on the other hand, is an injury to a ligament. Common sites for sprains include the ankle and knee. A sprain occurs when a ligament is overstretched, leading to potential partial or full tears. Sprains often happen when an athlete lands awkwardly, steps on another player’s foot, or twists a limb into an unnatural position.

Similar to strains, sprains can also be self-diagnosed using these assessments:

– Pain when palpating the injured area
– Pain when moving or bearing weight on the affected joint
– Bruising and swelling in the affected area

The key difference between these two injuries is their location. Sprains are localized to joints, while strains are specific to muscles.

Future blog posts will provide examples of how you or your athlete can manage these injuries effectively.

If you suspect that you or your athlete has sustained a soft tissue injury, it’s important to have it evaluated by a physical therapist as soon as possible. We will assess the severity of the injury and provide detailed guidance on how to get back in the game as quickly as possible!

It’s an athlete’s right of passage

The first time may have happened as you landed from a jump playing basketball or making a cut while playing soccer. And since that first time, it has happened several more times.

What should you do the next time you sprain your ankle? Should you go to an athletic physical therapy clinic like ours in McLean and Bethesda?

Most likely, it will be swollen and painful, but you should be able to put some weight through it.

If you cannot put any bodyweight through your ankle, see a physical therapist or doctor immediately.

Assuming a fracture has been ruled out, it is time to start the physical therapy process immediately. The sooner you get started, the quicker you recover!

Initial goals are to reduce swelling, restore the range of motion to the ankle, and get back to walking pain-free, without a limp.

Range of motion is often restricted by joint swelling, and below are a few tips to help.

  1. Move the injured ankle through a comfortable range of motion. This can be drawing circles with your ankle, drawing out the ABCs with your ankle, or pumping your ankle up and down. The important thing is that the joint is being moved.
  2. Elevate the limb above the heart as much as possible.
  3. Perform aerobic exercise that elevates your heart rate to increase blood flow to the area, which will help clear out extra fluid in the joint. An exercise bike is recommended so that weight bearing is not an issue.

Next is strengthening.

Once you have restored the normal range of motion and can comfortably bear weight through the injured joint, it is time to start building up the ankle’s tolerance to higher loads and the demands of life/sport. This will be a combination of strengthening and balance exercises.

Here are a few exercises to help you work on strengthening and balance.

Single leg stance with rotation
Front foot elevated heel raise
Multidirectional RDL 

Finally, the fun phase. Sport-specific movements! Movements during this phase are tailored to your sport, often involving change of direction/cutting drills. Various jumping and hopping movements, called plyometrics, are also included.

Below are 2 examples of plyometrics drills we have used with our athletes.

Alternating split stance leaps
Lateral bounds
 
It is important that you feel 100% confident in your ankle before you are finished with rehab.

If you or someone you know recently sprained their ankle, reply to this email and accelerate your return to the field!

Runners: Here is a quick workout for you

I get it. Running is a lot easier than going to the gym. Just throw on your running shoes, walk out the front door, and you are good to go! Meanwhile, the gym requires you to leave the house, get in the car, drive there, and fight for equipment and space with others. Not to mention that the traffic in McLean and Bethesda is no joke!

By now, you probably know that cross-training is essential to improving running performance and avoiding physical therapy. But many runners find it hard to make time for anything besides running. It is easy to fall into the trap that we have seen many runners fall victim to. This is the mindset that the only thing that counts towards training is the miles they log. But this is not true!

Cross-training is essential for runners because it helps prevent injury, build/maintain strength, and improve your run times and muscular endurance! Lifting weights and moving your body in varied ways from your typical movement patterns (running is repetitive!) builds resilience to injury. A typical cross-training program for a runner should include strength training of not only your lower body, but upper body and core as well. Lower body strength is important for power production and single leg control during your run. Core and upper body strength will help you maintain efficient running posture and overall muscular conditioning. Cross-training doesn’t have to be long and daunting.  2 sessions per week of 30 minutes of strength training is a great place to start! Below is an easy full-body template and example workout to try at the gym or home!

Step 1: 5-10 minutes warm-up 

  • Get your muscles warm
  • This can include jogging, biking, or dynamic stretches

Step 2: Full Body Circuit 

  • Choose 1-2 exercises for your lower body, and 1-2 exercises for your upper body
  • Include compound movements! This includes exercises that use your lower body, upper body, and core to work together
  • Perform each exercise for 8-10 repetitions, and repeat the circuit for 3-4 total rounds

Step 3: Core and Plyometric Finish 

  • Choose 2-3 core exercises and 1-2 plyometric exercises
  • Perform each exercise for 20-30 seconds, and repeat the circuit for 3-4 rounds

Example: 
1. Jog on the treadmill at 5-6 MPH for 5 minutes

2. Perform 3 rounds of the following circuit:
A. Reverse Lunge x10 reps on each leg
B. Dumbbell Bench Press x10 reps
C. Goblet Squat x10 reps
D. Shoulder press x10 reps
*Choose a weight that is challenging for you, but you can complete all 3 circuits

3. Perform 3 rounds of the following circuit:
A. Sprinter Step Up x 30 seconds
B. Side plank x 30 seconds on each side
C. Russian twists x 30 seconds

If you are a serious runner that is looking to step up your performance or avoid injury, contact us for a customized cross-training program designed by our resident triathlete, Dr. Kelly Henry!

What I wish about training as a high school athlete

This week we have a special guest post from Dr. Samuel Kinney. Dr. Kinney is a performance physical therapist in our McLean location. In addition to being an amazing physical therapist and strength coach, Sam was a successful collegiate soccer player. Learn more about Dr. Sam here.

“Lifting weights will stunt your growth.” “Squatting heavy is the key to training.”

The advice that I received as a high school athlete was all over the place and as a physical therapist, I now roll my eyes.

I wanted to impress my high school coaches and be the best athlete that I could be, but weight training confused me, and I didn’t know where to start.

Weight training in high school often felt like a competition among my teammates.

I placed a large emphasis placed on how much weight was on the bar. This was a result of encouragement from my team and my internal motivation to lift the most weight I could.

There wasn’t much thought put into our weight training program besides that. I eventually had a back injury while attempting to power clean more weight than I was ready for.

Fortunately, I went to physical therapy, which sparked my interest in the sports physical therapy profession. Unfortunately, I had to take time off from the gym and lost a lot of the progress that I had worked so hard for. While back injuries are impossible to prevent, had I known what I know now, I could have greatly reduced my risk of having one.

Training for your sport off the court or field is an essential part of developing strength, speed, and overall athleticism. A more scientific approach to training helps you excel at your sport and keeps you in the game by reducing your risk of injury. But knowing where to start and what to do in the weight room is one of the greatest challenges for a young athlete.

If the weight being lifted is causing you to struggle to maintain form and you are unsure that you can control the weight, it is too much. The advice that I would give to my high school self would be to forget about how much weight is on the bar and instead focus on how well I can control the weight through the full range of motion of the lift. It is more important to progressively increase the weight on the bar over time rather than in one weight training session.

If you are a high school athlete or the parent of one, Dr. Sam Kinney is currently offering free performance assessments as part of our rising-star training program.

This assessment will show you and your athlete the secret to helping them avoid injury and take their performance to the next level.

Contact us for more information and to sign up.


Need for speed: how young athletes get faster

As my old high school football coach used to say… Speed kills.

Even in physical sports like football, faster players usually have an advantage over bigger competition.

Speed training can be (and should be!) incorporated into an athlete’s workout routine and is an important part of the return to sport process in physical therapy. Whether your athlete is working to be the fastest on the field, track, or court, there are three key essentials to consider when trying to increase speed:

  1. Learn and practice the basics 

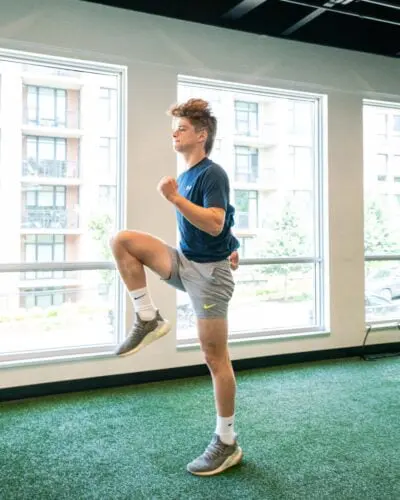
Just like any other sport, there is a technique to sprinting. You can do a few basic drills to practice sprint mechanics and emphasize proper foot strike, forward knee drive, and core activation for a fast and efficient stride. Marching, skipping, and high-knee run drills encourage this technique:


  1. Strength training! Quads, hamstrings, calves, core

Running fast requires more than moving limbs quickly to be successful. Strength is essential to running to create power, endurance and prevent injury. While athletes use virtually all their muscles to run at top speeds, some main movers for sprinting include the hip flexors, quads, hamstrings, calves, and core. Compound lifts and single leg strength exercises targeting these muscle groups are a great way to make an athlete’s stride stronger:


  1. Practice accelerations and sprinting 

Speed training can be broken down into parts, starting with the initial acceleration. There are a few drills to help decrease the time it takes you to get from the start to full speed:


An athlete can progress into repeated sprint efforts. Some common sprint workouts include:

  • Flying 10s: Build speed for 20-30 yards, sprint for 10 yards, slow down for 20-30 yards
  • 10×10: Practice accelerating for 10 yards, then slowing down as fast as you can. Repeat 10 times.

Are you an athlete or the parent of a high school athlete working to be a step faster than the competition?

Here is your solution.

We are in the midst of summer, but it’s not too late to participate in our summer rising-start training program. In this program, your athlete will receive a personal performance assessment and a custom-designed speed program that our team will coach them through.

If you dream of leaving your competition in the dust, contact us to learn more and sign up!

×