How Our Physical Therapists Coach Squats for People with Low Back Pain

Did you know that experts estimate up to 80% of the population will experience back pain at some time in their lives.

The sports physical therapy patients that we often assume that they no longer can perform common weight training exercises like squats.

However this is not the case. People experiencing lower back can continue to perform these exercises however may require the help of a performance physical therapist to learn how to most effectively do so.

Check out the video below to see how I coach squats for our physical therapy patients experiencing lower back pain.


Runners: How To Vary Your Training to Optimize Your Results!

Implementing variety into training is something that is commonly underutilized and overlooked among recreational runners. This is often the topic of conversation after we perform our running analysis or within a sports physical therapy session.

Varying speed, intensity, and distance can be a useful tool in run training, whether you’re training for a big race or just getting back into it.

Running at different speeds or intensities allows you to vary which muscles and tissues you are repeatedly straining. When you sprint, your technique is going to look very different than when you are going for a long, slow jog.

Including both in your training helps you to disperse the stress of the workout over more tissues, and can help prevent overuse injuries! Some examples of what this variety might look like: 

  1. High Intensity Interval Training (HIIT) runs: “sprint” training! Work to rest intervals should be greater (1:4, 1:5). For example. sprinting for 10 seconds and walking/jogging for 50 seconds. Repeat for 10-15 minutes. Great for a track or grassy field! 
  2. Interval training: longer bouts of faster running, not as intense as a full sprint. Work to rest ratios are going to look more even (2:3, 1:1 or 2:1 ratios). For example, fast running for 1-2 minutes, jogging for 2-3 minutes, repeat for 10-15 minutes. 
  3. Tempo training: usually done as a “long run”. Pick a pace, and try to stick to it throughout the duration of your run. Distances should be specific to what your goals are!
  4. Using Rate of Perceived Exertion (RPE) Scale: If you don’t know what pace time is right for you, start with RPE! You can use a scale of 0-10, with 0 being completely at rest and 10 being a sprint as fast as you can possibly go. Fast bouts of HIIT training should be performed at an RPE of 8-10, whereas interval training should be closer to RPEs of 5-8. An example of an RPE scale can be found here 

In addition to preventing injuries, adding sprints and interval training can help increase muscle mass, cardiovascular endurance, and improve your ability to cover more distance in a shorter amount of time. If you’re finding that you’re constantly dealing with the same injury, consistent soreness in one muscle group, or you just want to shake up your training, a performance physical therapist can help find the right running program for you! 


How land training improves swimming performance

Dryland Training: A Swimmer’s Love-Hate Relationship

Dryland training is something every swimmer has a complicated relationship with. However, building strength and power on land is just as vital for enhancing race performance as clocking laps in the pool. Shoulder pain and overuse injuries are the most common issues swimmers face, often limiting their ability to maintain high-level training. So, how can we strengthen our shoulders on land before returning to the water?

Building Shoulder Strength and Resilience

For swimmers, it’s crucial to develop sufficient strength and range of motion in the shoulders to withstand the repetitive demands of a two-hour swim practice. The rotator cuff is key to stabilizing the shoulder during overhead movements and generating power during the pull-down phase. Lift-off drills like this one focus on activating the rotator cuff muscles and building tolerance at the end range of motion. Once comfortable with this drill, incorporating overhead pressing variations and kettlebell stabilization exercises will help engage the larger muscles of the trunk and core, enhancing shoulder resilience.

Developing Full-Body Power

Swimming is a full-body workout, so it’s essential to include elements of full-body power in your dryland routine to prevent injuries during high-speed training or racing. Overhead medicine ball passes are excellent functional exercises that challenge both your overhead strength and full-body stabilization in a dynamic setting. To further simulate the pull-through motion of your stroke, progress to full medicine ball slams—no water required!

Try this to improve your hip and trunk mobility

Who doesn’t want to loosen up their hips and trunk while building strong hamstrings and glutes?!

It is common to encounter youth athletes and active adults in athletic physical therapy and injury rehabilitation settings who have tight posterior hips and stiff rib cages. This limits the amount of rotation that they available through the trunk and reduces mobility in a variety of different directions within the hips.

As a result, more stress is placed onto the lower back, knees, and other areas of the body. Overuse injuries often follow that send people to physical therapy, including general lower back pain, lumbar disc injuries, knee arthritis, meniscus injuries, etc.

The good news is that the root causes of these kinds of injuries can be addressed and often do not require a boring home exercise program.

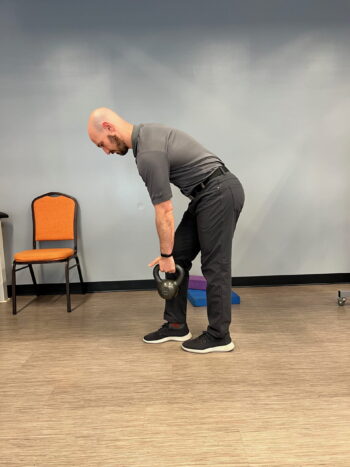
The Single Leg RDL (Romanian Deadlift) is a fantastic drill that you can implement into your workout routine to improve your hip/trunk mobility and strengthen your glutes/hamstrings.

This drill is particularly powerful for rotational athletes like golfers, tennis players, lacrosse players, and hockey players.

We typically start our patients and training clients with the kickstand version of the Single Leg RDL before progressing to the more advanced versions below.

Kickstand RDL (front leg emphasis)

Kickstand RDL with Foot on Wall

The key with these activities is to ensure that you feel the back of your hip, glute, and hamstring working (on the working leg), while also feeling your abs working. You should not be feeling your lower back at any point during the drill.

Are you interested in learning more ways that you can adjust your exercise program to correct old injuries, improve your performance and/or stay pain free? If so, simply contact us!
×